MAKING A HARDWARE ORGANIZER CABINET

I used to have all my bolts in one large box.

It was fine when I only had imperial bolts for my Mini, and I knew where all of them belonged, but then I started to work on some metric stuff, and a few years later, it started to get confusing. At one point, I began to find wood and drywall screws in there as well. It was a clear sign something had to change because… there were more boxes of nuts, washers, circlips, bearings and of course, the forbidden random. All had the same evolution. If you’re reading this, I’m sure you have a few too.

Around that time, I was given a couple of used organizers with plastic drawers. They were dirty, so I washed them, 3D printed some dividers and started an organization system. I was able to sort all the metric hardware, which was pretty good… until I had some more that didn’t fit. I was also moving those organizers from place to place as I didn’t have a permanent spot for them.

Well, enough of that. I was spending too much time looking for stuff I knew I had but couldn’t find, so I decided to make a cabinet where I could have an organizing system that actually worked.

I had stored some 20mm MDF boards that looked perfect candidates for this cabinet. They were for a project that didn’t happen, so I could use the space they were taking. This forced me to decide the cabinet would be made out of 20mm MDF.

Next, I laid down the stuff I wanted to store in the cabinet. All bolts, nuts and washers should be organized in individual containers, but I also wanted space for bigger items. I wanted to have some drawers.

I was looking online for local second-hand desk drawers, but they were all a little bit expensive, so much so that a new nightstand was cheaper. And whiter too.

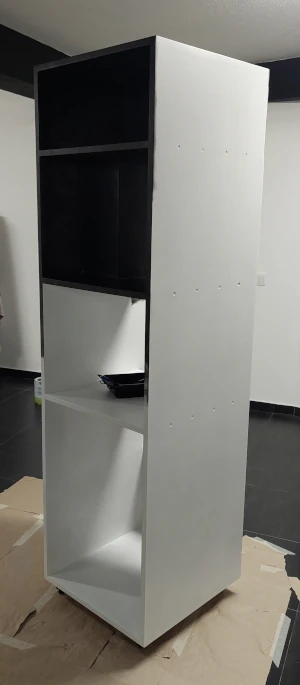
I ended up buying one, which became the basis for the cabinet design. The nightstand is 50x50cm, has four large sliding drawers, plus a solid top on which I could build up more vertical storage space (the limit being the top of the room’s door frame). The small footprint was just what I was looking for – we all know how vital floor space is in a home workshop.

I wasn’t sure how to organize the vertical storage, so I thought having limits and defining the final dimensions would help me figure that out. I bought the two side panels and cut the top and bottom from my old boards. With this, the frame around the nightstand was complete.

But the whole thing was getting very heavy at this point, so adding some wheels felt like the right thing to do for two reasons: first, I could move it; second, the distance between the MDF and the floor is only beneficial in case the floor gets wet or humid (MDF does not like moisture). Plus, it’s just easier to keep clean.

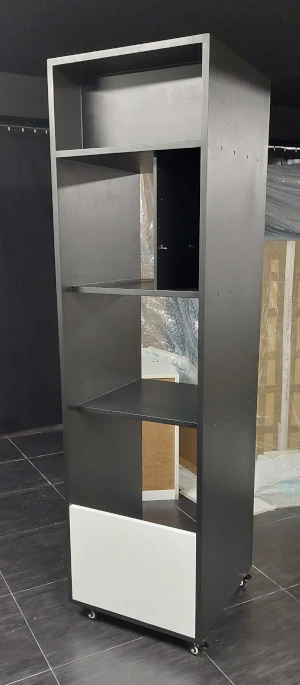
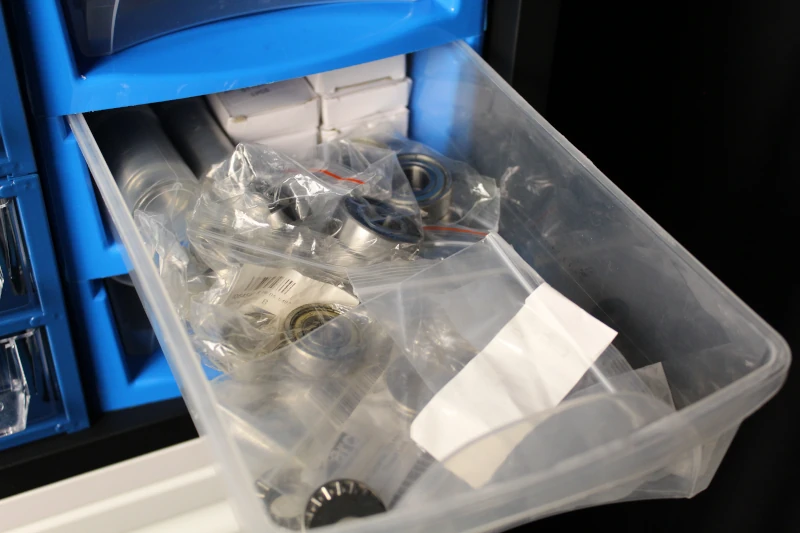
For the vertical storage, I had three organizer modules with six drawers each; that’s 18 drawers already at full capacity. I looked up online and found the exact same modules still available for sale, so I bought another one with shallow drawers. The idea was to stack them just as long as I could look into the first row of drawers. That worked great. What also worked well was an offer of a few stackable gummy bear containers of the size I needed to take the space left at the side of the organizers.

But while that was going well, the whole cabinet felt flimsy. Not only the cabinet itself, which was too high with no reinforcement in the middle, but also the stackable towers felt unstable. I was hoping a 3mm backboard would make it more rigid for the cabinet, but I started to feel unsure about it. Since I still had some MDF left, I added some shelves to reinforce the structure and break the organizers stacking in half.

Then, when I started taking the dimensions for the backboard, I realized I had lots of wasted space behind the organizers. And that’s when it hit me.

3D printed tool to create and align dowel pin holes for the shelves

I COULD DUPLICATE THE STORAGE BY MAKING THIS A TWO-FRONT CABINET!

Instead of having a backboard, I could get six more organizers and some gummy bear containers and duplicate the storage. So I did just that. Actually, I couldn’t get enough gummy bear containers, so I had to create a few smaller shelves in that place. 

Since the backboard had been deleted, to help reinforce the frame and add some extra room above the organizers, an extra shelf was added. That extra compartment was divided into two: one for sandpaper and another one for tape rolls.

This was my first wood project (does MDF count as wood?). The design-as-I-go approach was probably not the best, but in this case, it worked well and I think it was because I had all boundaries defined early in the process. All I had to do was to make the most out of that confined space.  

After gluing the boards and adding the screws, I was surprised to see how solid the cabinet became. I mainly used 4mm, 80mm long drywall screws, pre-drilled to screw core size and tighten “just enough”. That way, I managed to avoid any splits in the MDF edges. 

I think that 20mm MDF might have been too much; maybe 16mm would be just as good and lighter. This thing is very heavy!

As for waste, I didn’t waste too much MDF, only one of the top doors because at first, I wanted to have the hinges on the top, but they couldn’t take the weight of the door, and it would fall off. I did look into proper hinge systems for that, but they take up too much space. I just changed to inset side-mounted hinges and cut another door.

Painting it took long hours. It had two coats of primer and two coats of black. I think each coat should’ve taken 2, maybe 3 hours. The black and white theme happened at the last minute. I was going to paint the nightstand black (because… hands dirty) and the cabinet in gray, but then… the rest of the room is black and white, so why not?

3D PRINTED STUFF

Having a 3D printer helped me a lot while making this cabinet. I was able to print some tools that helped along the way, but the final touches were saved for last. The door handles for the top doors look and feel fantastic – and keep me from touching the white doors. 

Then there are some dividers behind the nightstand. I found this little space to be very useful for storing long tools that I only need from time to time and have been rolling around in a card box.

I printed these small adjustable feet to keep the gummy bear containers in place when I open their drawers. The bases have a large hole which allows them to be adjusted so that the containers can’t move in any direction.

But the coolest was the roll-up door that hides the small shelves. Works like a bread box or a garage door.

Finally, I made five feet to help the little caster wheels with the weight. The casters are rated for 50kg/110lb each, and the cabinet has 5 of them, but… I’ve also read the Amazon reviews, so you never know. If one of the corner casters fails, well, no more penguin tower.

As this is getting closer to being finished, it feels more and more like a piece of garage furniture than just a simple tool cabinet. 

I haven’t had time to sort all my boxes yet, but I’m pretty happy with the result. And I see the difference – I’m starting to get to things faster and without thinking as much. 

Leave a Reply

Your email address will not be published. Required fields are marked *